Activity Info
cake
4 - 13 year olds
local_offer
Free
English
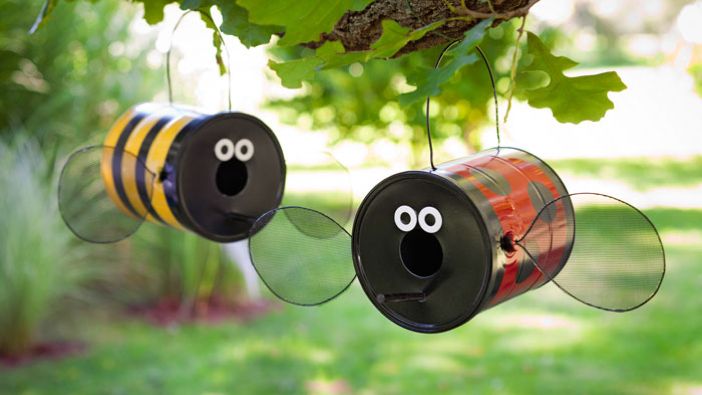
Build a Fun Bug-Shaped Birdfeeder
Build a Fun Bug-Shaped Birdfeeder
General Crafts
Create a buzz with these bumblebee and ladybug birdfeeders made from repurposed paint cans.
Project Overview
- Skill Level - Beginner
-
Estimated Time - Few Hours
-
Estimated Cost - Less Than $100
Tools
Materials
Instructions
Want to get the kids involved in an Earth Day project? Try these super-fun (and super-easy) bumblebee and ladybug birdfeeders. These one-day projects come without a big cost to your wallet or the planet - especially if you use recycled paint cans rather than new ones.
Building the Birdhouse
Step 4 - Cut four pieces of wire and twist them to form circles -- these will serve as the wings. Then cut four pieces of screen to the same size as the wire circles.
Step 5 - Lightly glue the screens to the wire circles. Set aside to dry.
Step 6 - Apply painter's tape to the bumblebee can where you would like black stripes. Likewise, apply circles of tape to the ladybug can where you'd like black spots. Then apply yellow spray paint to the bee can and red spray paint to the ladybug can. When the paint has dried, remove the painter's tape.
Step 7 - Cut large holes in the center of the plastic lids.
Step 8 - Glue steel washers just above the large holes in the plastic lids. These will serve as the eyes. Let dry.
Step 9 - Cut the dowel in half. Use an awl to help create holes in which the dowel halves will be placed. Poke these halves into the lids below the large holes created in Step 7.
Step 10 - Insert the ends of the wings into the holes created when you removed the paint can handles in Step 1. Then cut additional pieces of wire and insert them into the holes you drilled in Step 2. (These will be used to hang the feeders.) Finally, put the lids on top of the cans and hang.
Details:
Hosted by Lowes
No comments yet.
Leave a comment
message