Kids Duct-Taped to the Wall Photo
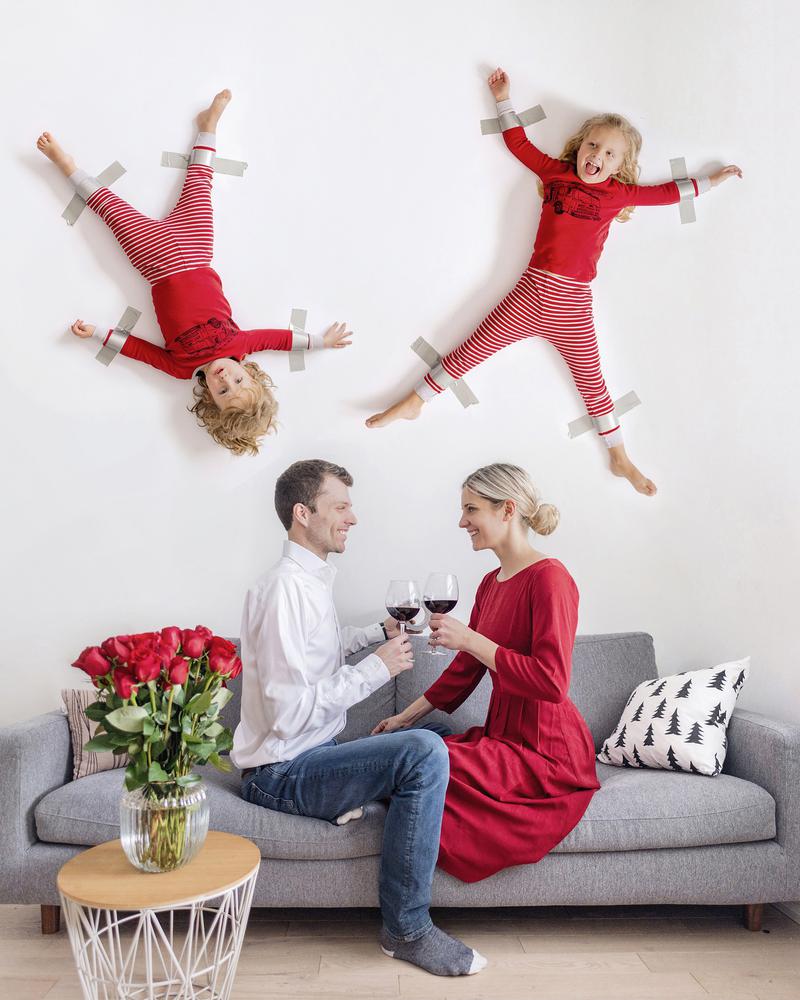
Kids Duct-Taped to the Wall Photo
Make this year's annual family christmas photos fun and excited, enough to make people smile or laugh out loud.
Be ready for some calls asking (1) what brand duct tape is this (ha!) and (2) how the heck did you do this??
And, not to worry, this photo doesn’t actually involve taping your kids to the wall. Which means the answer to question #1 isn’t all too important – but it’s just good ol’ Duck Tape if you’re still curious.
Sorry to disappoint the duct tape aficionados with you – the tape we use would never hold up a 35-pounder with just a few pieces (not that I want to try). This is all thanks to good ol’ Photoshop and a white backdrop that I place on the ground for the kids to lie on.
Best of all, this whole session will only take 15 minutes!
Details:
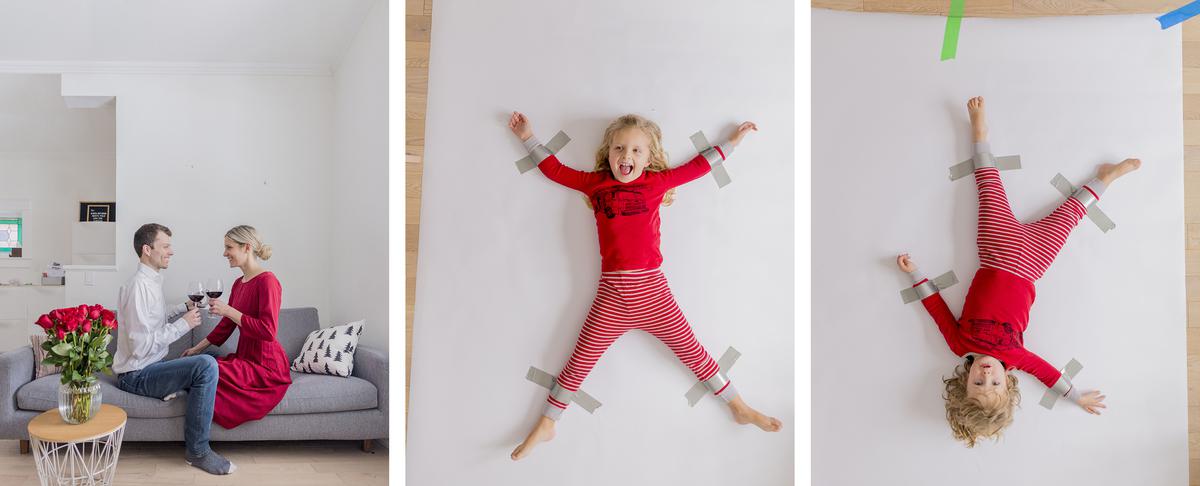
[ Step 1 ] Take a photo of you and your significant other sitting on the sofa in front of a white wall. Ours isn’t fully white but there’s enough to make this work (see step 4). Don’t forget to take down any frames or other wall decor that would otherwise be behind your heads.
[ Step 2 ] Place a white photo background on the floor and tape it flat (painter’s tape not duct tape please!). A large white sheet will work as well – just make sure to iron it well because getting out wrinkles in Photoshop is a pain in the butt (I had to do that with the first photo).
[ Step 3 ] Get your kids to lie down and hold their legs and arms out. Tape down their wrists and ankles. Make sure you position your kids in the same direction as they’ll be on the wall and use a window or light source in the same position as your sofa photo to make the shadows line up in all photos. I photographed Isabelle and Nicolas in opposite directions so I could have one upside down and one right-side up. And don’t forget to make the hair match up to the way it would fall in the photo (my first photo had a hair fail with Isabelle’s braid haha).
Side note: I photograph Isabelle and Nicky separately just because my backdrop isn’t wide enough for both but you can obviously do them together if you have enough space.
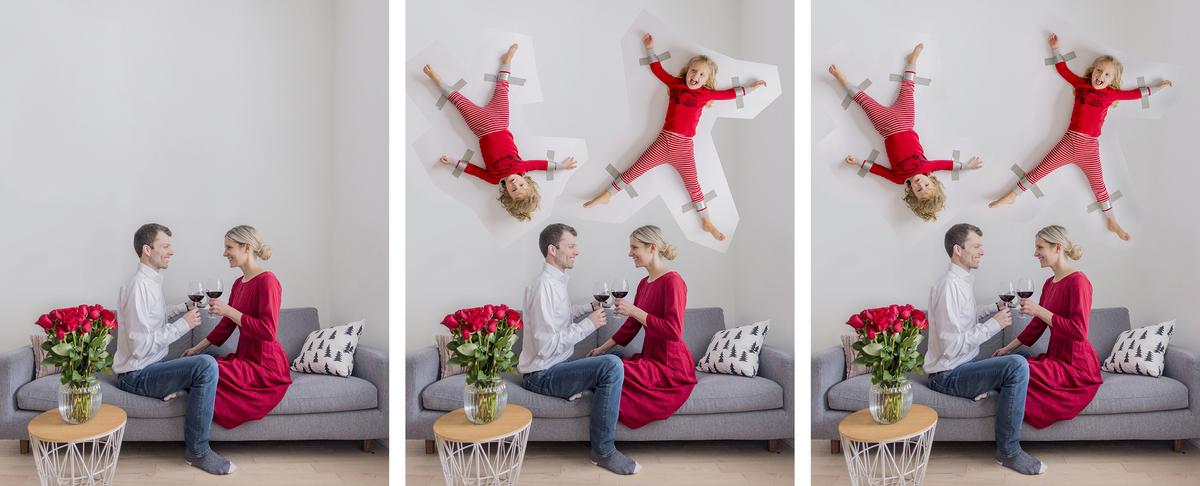
[ Step 4 ] If your sofa backdrop isn’t large enough or all one uniform colour, you’ll need to fake it in Photoshop. We don’t actually have a full wall behind our sofa so I used the photoshop brush and healing tools to create the look of a wider wall. We also don’t have very high ceilings in our house so I used the transform tool to stretch the wall upwards and create about a foot more wall so that I could scale the kids properly.
[ Step 5 ] Use the lasso tool to roughly cut out both kids and paste them onto the photo the way you would like them to be on the wall. You’ll probably have to play around with re-sizing and rotating a bit until you get the right fit.
[ Step 6 ] To make life easier for yourself, try and match the kids backdrop to your wall as closely as possible by playing with the brightness, contrast, etc. of the overlaid images. I like using the dodge and burn brushes to make the necessary adjustments to the kids background after I’ve pasted them onto the wall. It’s a super quick trick and helps you avoid the tedious task of having to completely erase the background. (Check out the middle and right photos above – the only difference between them is that I used the brushes to brighten / darken the edges to blend better with the background).
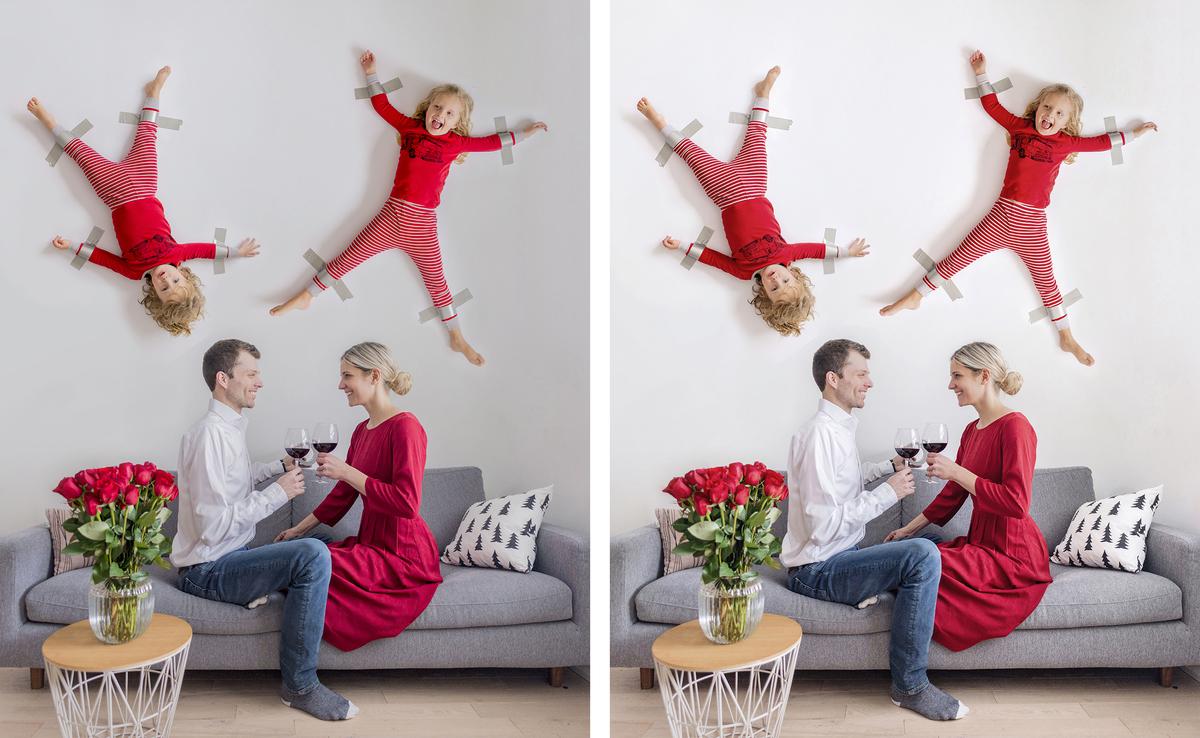
[ Step 7 ] Use the eraser tool to blend the leftover kids background with your wall.
Side note: if your background is a lot brighter than your kids, you can just use the magic wand tool, but I find using the burn/dodge tools combined with the eraser to be faster / easier, especially with bright spots on the kids skin or PJs as well as with keeping the shadows as realistic as possible.
[ Step 8 ] Edit the photo however you like to finish it up. I like to leave the bulk of editing to the end so that everything gets editing together and looks more like one uniform photo. If you’re interested in how I edit, check out the Instagram-editing tutorial here (I edited the photo entirely on my phone in this step to get the wall a lot brighter and add a bit of a filter).
That’s it! It might seem daunting but all-in-all it only takes me about 15 minutes to put this photo together once I have the final three photos that I’m combining. Let me know in the comments if you have any more questions about this photo series.
Hosted by Happy Grey Lucky